Getting Started with Yist
Learn how to set up your GitHub account and obtain the necessary Personal Access Token for Yist
1. Creating a GitHub Account
Visit GitHub's website
Open your web browser and go to github.com.

Sign up for a new account
Click on the 'Sign up' button and fill in your details: username, email, and password.
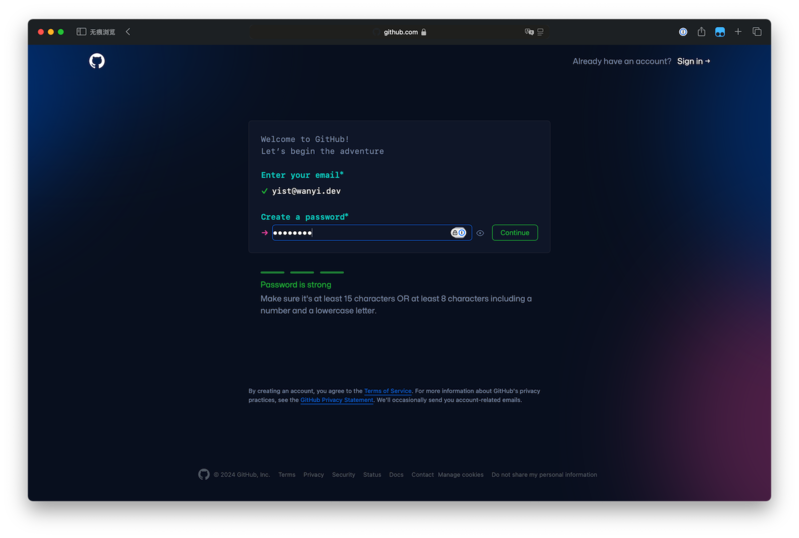
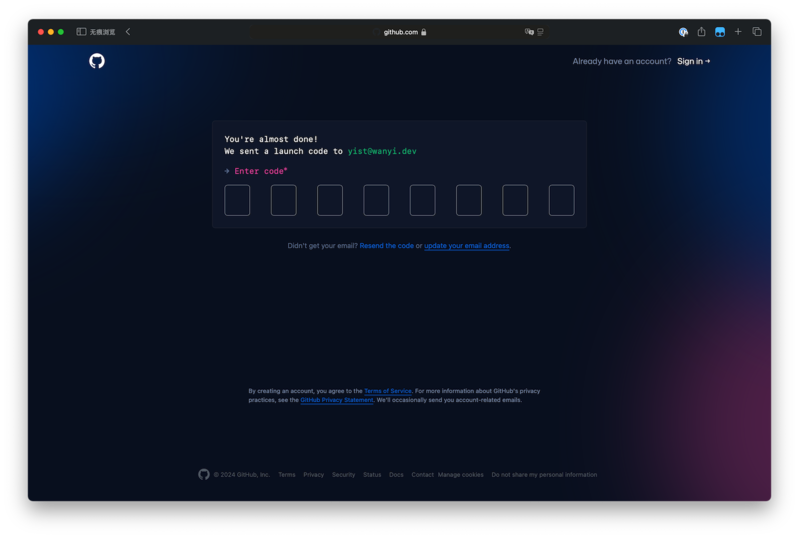
Verify your email
Check your email inbox for a verification message from GitHub and follow the instructions to confirm your account.
2. Obtaining a Personal Access Token (PAT)
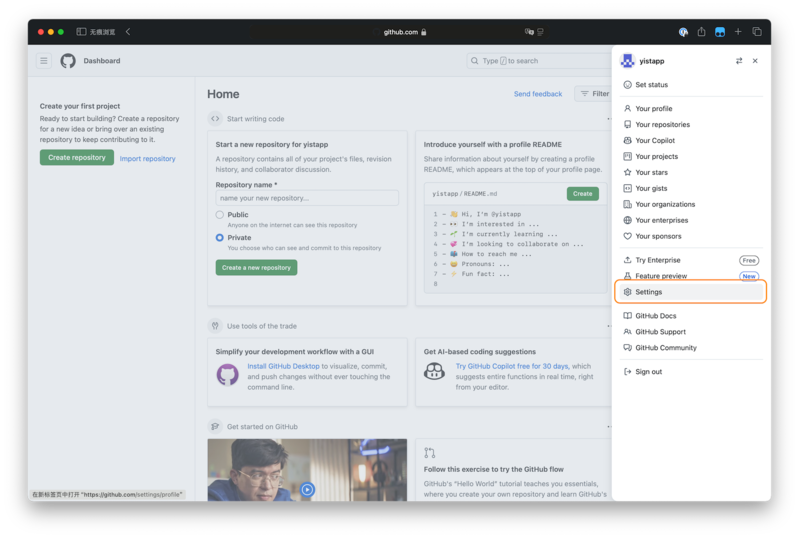
Access GitHub Settings
Once logged in, click on your profile picture in the top-right corner and select 'Settings' from the dropdown menu.
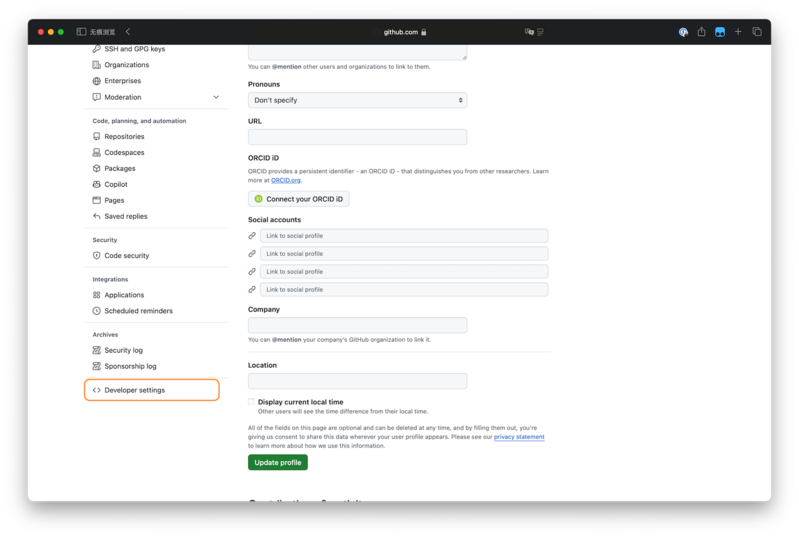
Navigate to Developer Settings
Scroll down to the bottom of the left sidebar and click on 'Developer settings'.
Create a new Personal Access Token
Click on 'Personal access tokens', then 'Tokens (classic)'. Click 'Generate new token' and select 'Generate new token (classic)'. Make sure to check the 'gist' checkbox to grant Yist access to your Gists.
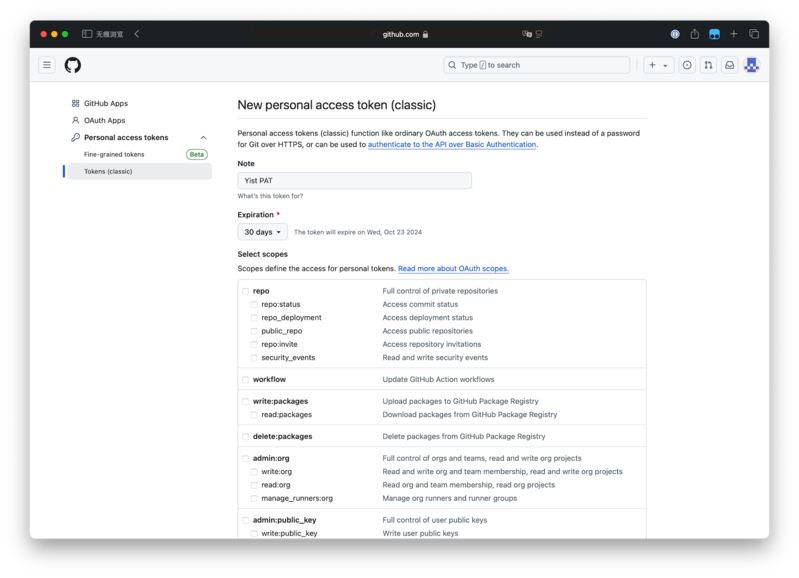
Configure token permissions
Give your token a descriptive name, set an expiration date, and select the 'gist' scope under permissions.
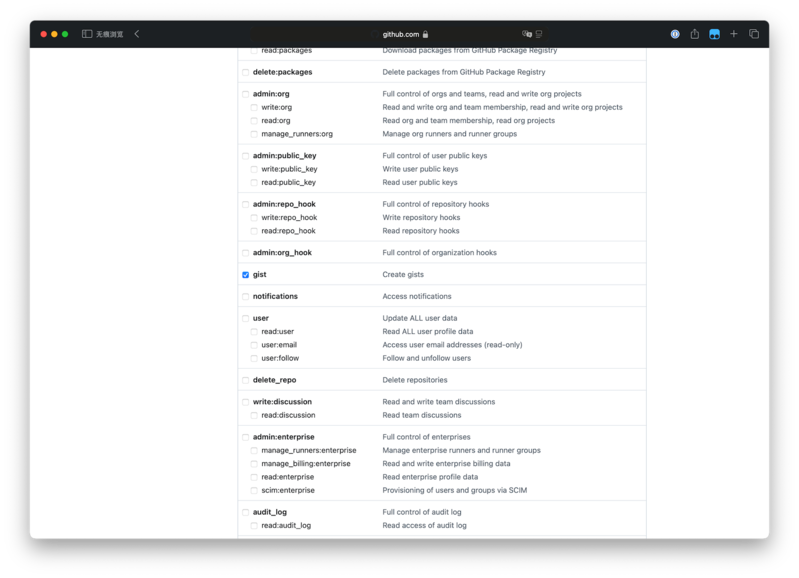
Generate and copy your token
Click 'Generate token' at the bottom of the page. Copy the generated token immediately - you won't be able to see it again!
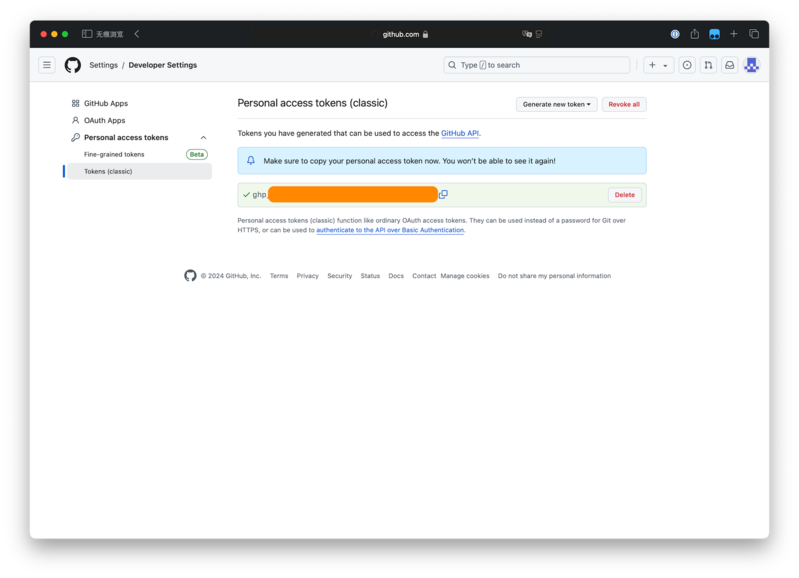
Next Steps
Now that you have your GitHub account and Personal Access Token, you're ready to start using Yist!
Download Yist and get started